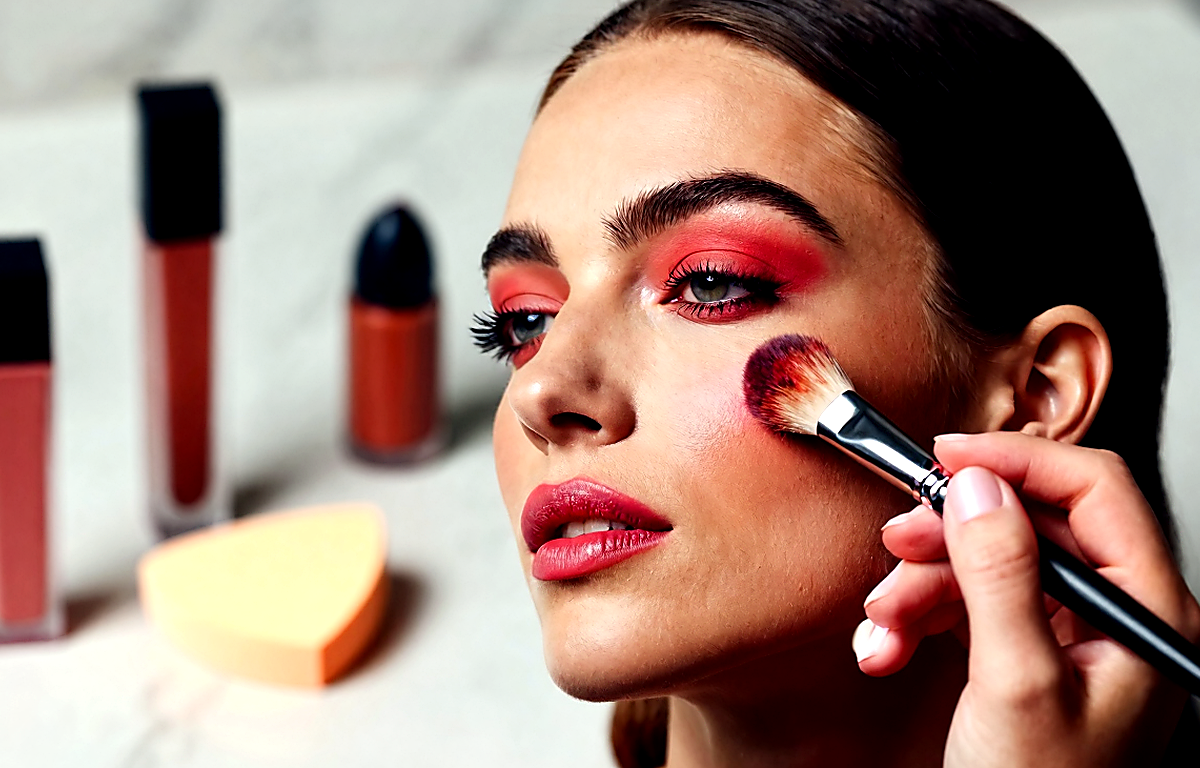
A lip and cheek tint works best when it behaves like a second skin: it freshens up the face quickly, does not fight with the rest of your makeup, and does not demand ten minutes of perfect blending. The main secret is simple: the shade should suit not only your skin tone, but also the overall intensity of your coloring, while the formula should match your skin type and the way you usually apply makeup. If you often end up with patches, the problem is usually not the color itself, but the combination of a too-fast-setting texture, dry areas on the skin, and trying to apply the product the same way you would a cream blush.
To avoid uneven patches, choose sheer, buildable tints in watery, gel, or serum textures rather than ultra-pigmented formulas that set instantly—especially if you are a beginner. For cheeks, the safest shades are muted pink, pink-peach, soft berry, and neutral coral: they forgive mistakes and blend more easily into daytime makeup. For lips, you can go a little brighter than you would for cheeks, but if you want one universal product, it is better to choose a medium-intensity shade that looks natural in a thin layer and does not pull too red, orange, or purple.
Tints love speed and preparation. On smooth, moisturized skin, they give that fresh just-back-from-a-walk effect; on dehydrated skin, they cling to texture and go on in little islands. So a good purchase is not only about a pretty color in the tube, but also the right balance between pigment, blending time, finish, and your usual makeup rhythm.
What a tint is and how it differs from regular blush and lipstick
A tint is a pigmented product that usually gives a thinner, more translucent finish that looks pressed into the skin compared with classic cream blush or lipstick. Its job is not to sit on top in a noticeable layer, but to create a long-wearing stain, as if the color comes from within the skin or naturally deepens the tone of the lips.
This quality comes with both advantages and pitfalls. The benefits are obvious:
- makeup looks lighter and more modern;
- color lasts longer on both lips and cheeks;
- the product is convenient for quick daytime makeup;
- a tint layers well if the formula is not too fast-setting;
- one product can replace both blush and a tinted lip color.
But there are nuances too. Unlike classic cream textures, many tints set faster and therefore require more precision. If your cheeks are dry, you use active skincare with acids, or your lips are flaky, the product may highlight what ordinary blush would have disguised. That is why, before buying, it is important to look not only at the swatch, but also at the finish description: watery, gel, mousse, glossy, matte, long-wearing.
If you like natural makeup with thin layers and a fresh effect, a tint is often a better choice than dense lipstick or thick cream blush. But if you prefer perfectly controlled blending and like to work slowly, classic blush may still feel more comfortable.
How to choose a shade: not only by skin tone, but by your face’s overall contrast
The most common mistake is choosing a tint only by the logic of “warm shades suit me” or “I love a cool pink.” In reality, three things matter at once: your skin’s undertone, the intensity of your natural coloring, and the look you want to create. The same berry shade can look elegant on a fair, high-contrast face and far too dramatic on soft, low-contrast features.
A practical guide looks like this:
- Fair skin with a neutral or cool undertone. Dusty pinks, cool pink-berry shades, softened raspberry, and soft plum in a very thin layer usually work well.
- Fair to medium skin with a warm or olive undertone. Look for pink-peach, tea rose, muted coral, and neutral apricot shades without neon brightness.
- Medium and tanned skin. Terracotta pinks, warm berries, red-browns, sheer cherry shades, and coral-red tones tend to look beautiful.
- Deeper skin tones. Rich berry, plum, wine, red-brown, and deep pink shades often show up better and do not disappear on the face.
But undertone is only part of the story. Contrast matters too. If you have fair skin, light eyes, and soft features, a very bright cherry tint can become the first thing people notice and look disconnected from the face. In that case, it is better to start with a muted pink-peach or tea rose shade. On the other hand, if your coloring is high-contrast—dark hair, defined brows, clear features—a shade that is too pale may simply vanish.
A good rule for a universal two-in-one tint is this: choose a color that resembles your natural flush after a brisk walk, but half a step brighter. That way it will not look foreign on the cheeks, and it will not seem too washed out on the lips.
Which textures are less likely to go on patchy
Not all tints behave the same way. Even the perfect shade will disappoint if the formula does not suit your skin or the way you like to apply makeup. To lower the risk of patchiness, it helps to understand which textures are usually easier to work with.
Watery tints give the sheerest effect and often look beautiful on the lips. On the cheeks, they can be either perfect or tricky: if the pigment grabs instantly, you have to blend very quickly and in tiny amounts.
Gel and serum tints are among the most beginner-friendly options. They spread more evenly, stay movable longer, and often give a natural dewy or satin finish.
Mousse and velvety tints can be beautiful on the lips, but on the cheeks they sometimes apply more densely and require good skin prep. If the formula is matte, it is more likely to emphasize dryness.
Oil and balm tints tend to feel more comfortable on the lips, though they can be less long-lasting on the cheeks. This is a good option for anyone who values comfort more than extreme wear.
If your skin is prone to dehydration or you have noticeable texture, look for wording such as “buildable,” “sheer,” “serum,” “gel,” “dewy,” and “natural finish.” Phrases like “high pigment,” “tattoo stain,” “quick set,” and “matte stain” are better chosen only if you are confident in your application technique.
By the way, an uneven base can ruin even good products. If you notice that makeup regularly catches on dry patches, it may be worth reviewing your basic skincare routine: sometimes the problem is solved not by changing the shade, but by calmer, more balanced skin prep. You may also find our guide useful on how to build a basic skincare routine for your face.
Why tint goes on patchy: 7 most common reasons
Patchiness rarely happens “for no reason.” It is usually the result of several factors at once. Here are the most common reasons even a beautiful shade can end up looking messy:
- Dry or dehydrated skin. Tint clings to areas that lack moisture and absorbs unevenly.
- Using too much product in the first layer. Tint works better when layered than when you try to get the full intensity from one big drop.
- Blending too slowly. Some formulas set within seconds, especially on warm skin.
- Incompatibility with foundation or SPF. If the layer underneath has not set or remains too slippery, the pigment can gather in patches.
- Applying it over powder. Most liquid tints do not apply as well over an already powdered surface. If you want a matte result, it is better to blend the tint first and add powder afterward. If you wear SPF and are worried about disturbing the coverage, this article may help: how to apply powder over SPF without patchiness.
- The wrong tool. Fingers provide warmth and press the color in quickly, while a dense brush can sometimes leave marks if the formula sets instantly.
- A shade that is too contrasting. Even a tiny mistake is more noticeable if the color is very dark, neon, or simply too red for your face.
On the lips, the list of causes is similar: flaking, skipping balm at the start, applying too thick a layer, and trying to rub out pigment after it has already started to dry. Long-wearing tints are especially deceptive: they can look beautiful in the first few seconds and then show up brightly in lip lines.
How to apply tint to the cheeks without streaks and patches
If you want an even flush, treat tint not like cream blush, but like a fast-setting pigment. That change in technique almost always improves the result.
The most reliable method looks like this:
- Prep the skin: your skincare and SPF should have had time to absorb. If there is obvious tackiness, give the base another minute.
- If you use foundation, do not apply too thick a layer in the cheek area.
- Place a tiny drop of tint first on the back of your hand or on a palette.
- Pick up the product with a finger, a damp sponge, or a fluffy synthetic brush.
- Blend with short pressing motions rather than dragging it out in long strokes.
- Work on one cheek at a time.
- Judge the intensity only after the first layer has settled, and add a second if needed.
For most people, the safest route is to place the color slightly above the apples of the cheeks and blend toward the temple. Positioning it too low can visually weigh down the face, while bringing a bright pigment too close to the nose can sometimes make redness look more obvious.
There is another useful trick: if you are afraid of overdoing it, first mix a drop of tint with a small amount of a neutral cream product—for example, a moisturizing primer or a light cream blush without strong pigment. That gives you a more manageable texture. But only mix a small one-time portion, never directly in the package.
If a patch has already appeared, do not try to furiously rub over it. It is much better to go lightly over the edges with a clean sponge carrying the leftover foundation or the thinnest veil of base, then softly reapply color. Aggressive blending usually only makes the problem area bigger.
How to apply tint to the lips without emphasizing dryness
On the lips, tint can be especially beautiful: it creates the effect of naturally bright lips without a heavy layer. But lips are also the first place to show dehydration, so preparation is critical.
Before applying, it helps to:
- remove visible flakes gently, without harsh scrubs;
- apply a thin layer of balm and let it absorb;
- blot away the excess with a tissue if the surface becomes too slippery.
Then choose your technique based on the result you want. For everyday makeup, the blurred method is usually the winner: apply a little tint to the center of the lips and blend it outward with your fingertip. That way even a vivid color looks softer, and the edges do not emphasize dry areas. For a more defined look, you can spread the product in a thin layer over the whole lip area and add a second layer only in the center.
If the formula feels noticeably drying, do not try to compensate by applying a thick layer over another product: some tints begin to pill or go on unevenly. It is better to choose a different texture instead, such as a gel or balm tint. The wear time may be slightly lower, but the overall result will look neater.
Do not forget about sensitivity either. If application causes persistent burning, pain, pronounced redness, swelling, or cracks, it is better to wash the product off immediately and not use it again. If discomfort continues, if you have lip skin conditions, or during pregnancy or while using active skincare with retinoids and other irritating ingredients, it is sensible to discuss your choice of cosmetics with a doctor.
Which shade to choose for different needs: everyday makeup, vacation, evening
The same person rarely wants only one effect from a tint. Sometimes you want an almost invisible fresh color; other times you want a more expressive accent. The easiest way to choose is not by what is fashionable, but by the situation in which you plan to wear it.
For everyday makeup, neutral and muted shades work best: pink-peach, tea rose, soft coral, calm berry. They look natural and are less likely to highlight application mistakes.
For vacation and hot weather, sheer coral-pink, watermelon, warm pink, and fresh reddish shades are often ideal. They support that lively, healthy-looking complexion even with minimal makeup. If your skin becomes more reactive or dehydrated in summer because of sun and air conditioning, it is better to choose flexible textures rather than ultra-matte ones. For overall summer skin comfort, you may also find this article useful on a lightweight body cream for summer without stickiness.
For an evening look, deeper berry, cherry, plum, and red-brown tones work well. But if you plan to use the product on both cheeks and lips, it is better not to go too dark: a deep shade on the cheeks can instantly turn into a visible patch. A simpler evening approach is to use a softer shade on the cheeks and the same color in two layers on the lips.
For mature skin, sheer satin formulas without excessive mattness are often especially flattering. They are less likely to emphasize texture and help the skin keep a lively look.
Mistakes when pairing tint with the rest of your makeup
Even a good tint can sometimes look odd not on its own, but within the overall makeup. There are a few typical mistakes worth keeping in mind.
- Too much mattness. If your foundation, powder, bronzer, and tint all create a dry finish together, the face can look flat and patches become more visible.
- Clashing undertones. A cool lilac-pink tint next to a warm peach bronzer can make the makeup look disconnected.
- The same intensity everywhere. Very bright lips, saturated cheeks, and dramatic eyes at the same time take away tint’s main advantage—lightness.
- Too much layering over a base that has not dried down. Sometimes it is better to give each layer a minute than to try to do everything instantly.
If you love the effect of natural freshness, it helps to think about makeup not as separate products, but as a balance of textures. For example, slightly glowier skin and a sheer tint almost always look more modern than a very powdered base with a sharply defined blush patch. And if humidity is ruining your hairstyle and your overall polished feel, the mood of the look can be saved not only by face products, but also by thoughtful hair care—you can read more in our article on how to keep hair from frizzing in humidity.
How to tell that a particular tint is not right for you
Sometimes the issue is not technique at all: the product simply is not for you. And the sooner you recognize that, the less disappointed you will be. A tint is probably not right for you if:
- even in the tiniest amount, it sets in patches every single time;
- the color consistently shifts into an unexpected undertone—for example, turning too orange or too fuchsia;
- on the lips, the formula sharply dries them out, feels tight, or emphasizes every line;
- on the cheeks, the product clashes with every foundation and SPF you try;
- it lasts, but does not fade neatly—after a couple of hours only uneven traces of pigment remain;
- you constantly have to fix the makeup around it.
In those cases, it is not always worth stubbornly searching for the perfect application technique. Sometimes it is better to switch to a less temperamental texture or choose a calmer shade. This is especially true for anyone who does makeup in a rush: the most beautiful products are not the ones that look spectacular in ads, but the ones that give a predictable result in real life.
When buying a tint, it helps to ask yourself three short questions: will I be able to blend it quickly, does this level of intensity suit me, and will it feel comfortable on my lips throughout the day? If the answer to any of these is no, there is a risk the product will end up sitting unused.
Conclusion
To choose a successful lip and cheek tint without ending up with patches, start not with the trendiest shade, but with a practical scenario: how quickly you do your makeup, how dry your skin is, and whether you need one universal color for every day. The safest choice for most people is a sheer gel or serum formula in a soft pink-peach, neutral pink, or calm berry shade. These options are easier to layer, look more natural, and are less likely to punish imperfect blending.
Most importantly, apply a small amount, work quickly, and do not skip skin prep. That trio—the right texture, the right shade, and a thin layer—is what most often separates a fresh, lively flush from those frustrating patches on the cheeks and dried-out lips.